Indirect Fire
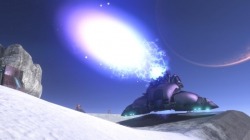
Indirect fire is an advanced tactic of Halo 3. It includes Wraiths, Missle Pods, Fuel Rod Guns, etc. Basically, anything that can hit someone from a different angle from where it was shot (if your using a weapon with which the projectile drops, use this tactic). Wraiths are most commonly used for this because it shoots a long-range Plasma Mortar that arches before hitting its target. It takes a long time to get good at, but is very useful if you're skilled with this type of fire. If you want, you can contact deathsintent and he will do your training. Simultaneous fire is a tactic where two or more Wraith users fire in a rhythm on the same spot so as to give the enemy no chance of escape from the mortars raining down on them.
Missle Pods can lock on to vehicles when they shoot. If you lock on, then look up in the air, it will stay locked on to a certain point. This gives you a top-attack missile.
Missle Pods can lock on to vehicles when they shoot. If you lock on, then look up in the air, it will stay locked on to a certain point. This gives you a top-attack missile.
Grenades
Grenades are definately the best way to take out groups of players, or players that are in hiding or you can't get to. When using grenades, you shouldn't just throw them randomly in hopes of getting a kill. You need to take a second or two to think about angling and distance before you can ensure that you even have a fighting chance to get a kill. If your target is behind a wall or other obstacle, throw the grenade up high so that by the time it lands, your opponent shouldn't have time to escape the blast. If your opponents, are in groups, plasma grenades or spike grenades are extremely effective in this situation. You can stick one person and, if they are smart they will run away so they dont get their teammates killed, but if they are a total n00b then they will probably be right next to somebody when your grenade goes off. When using incendiary or spike grenades, these work extremely well in buildings or tight spots. The blast radius is very good on these, especially in bubble shields or buildings. I wouldn't use frag grenades to kill targets in cover. Use plasmas and spikes to get targets in cover. Use frag grenades in the open and incendiary grenades to keep enemies from advancing. Also, if you are taking on fire but you can't see your enemy, use bank shots with the grenades to bounce it off of a wall into your enemies area. Note that this tactic does not work with spike or fire bombs. Also, it is really useful if you know your enemy is near the elevator, so you can chuck one up the elevator and it will pop out and kill your enemy.
Operating in Squads
Operating in Squads is a very affective tactic. If you are on a team in a multiplayer game, you should stay in a tight group and focus on protecting each other. This tactic is extremely useful for clearing out buildings and taking out unprotected groups of players. Note that you should conserve your ammo and not have every single player all firing on one person running across the map. Having 6 players in a group doesn't just make a squad. You have to have an array of weapons and players with different skills. Small maps are perfect for squad on squad matches. Lets say you have 6 men in your squad in a small building. Have one man with a shotgun take point. Have two SMG's on either side watching for ambushes, two Assault Rifles for distance cover and to watch up high, and another small arm covering the rear. Also try and exercise having a heavy weapon in the squad in case you are attacke by a vehicle.
Ambush
An ambush is basically a massive suprise attack. The purpose of this is to suprise your enemy with firepower so that by the time they figure out what is going on, they should already have hit the floor. All you need to do is find a good hiding spot. If you see somebody running by, wait until they pass before jumping out. If you can get them from the rear, this is better because they have to turn around and then find you, that is, if they can.
Having The Appropriate Arsenal
This might not seem like much, but when taken into consideration, it could help you out alot. Based on the map or game mode that your in, you need to find the right weapons. For instance, if your on Snowbound, you dont want to charge into a player and engage in close combat with a sniper rifle. And you dont want to get caught in the middile of a long range fire fight with a sword and magnum. So, be more aware of your maps and choose the right weapons carefully, because (The riflemans creed states this) Me without my rifle is useless, and without my rifle, I am useless. Therefore implying that not only are you useless without a weapon, but you are also useless without the RIGHT weapon.
Suppressing Fire
Suppressing Fire is like covering fire, but it is almost the opposite. Let's say you and your squad are trying to advance into the enemy's territory, but there's a machine gunner who is not cutting you any slack. The purpose of suppressing fire is to overwhelm the enemy to the point where he is forced to take cover, therefore there is nobody on the machine gun, and that is when you send your squad either on the flank or on the advance. When used properly, this tactic can prove deadly, especially in maps with bunkers and machine gun turrets.
Cover Fire
Cover fire is also a very effective tactic. This is most effective when used while flanking.The purpose of cover fire is to attract the fire to one group of soldiers. Let's say there's a gunner in the bunker on high ground. You and your squad are pinned down behind the rock face and if you step out, you will get hosed. This is where cover fire comes into play. You wait for the gunner to stop firing, and then 1 or more soldiers lean out and fire on the gunner. Once this has happened, a seperate force of a few soldiers moves out into the open. This is what happens. The gunner sees what is happening, but he can only fire on one group at a time. If he fires on you, the squad can either take him out or continue to advance while you take cover. If he fires on the squad, you protect them by either taking the gunner out, or providing more cover fire until they have reached their cover. The gunner can't be in two places at once, so there is no way he should be able to kill both groups of players, unless you fail miserably and get killed.
Flanking
Flanking is perhaps the most common tactic used in the military, so it will work perfectly for Halo, too. Let's say you and your team are pinned down by a machine gunner in the bunker on High Ground. You can't go out in the open or you will get shredded by the bullet chainsaw. This is where flanking comes into play. You flank the machine gunner by sending 2 or 3 guys around the side where the machine gunner wont notice you. He will keep his eyes on where the rest of the squad is while you go around and sneak in from the side. Then, when they will least expect it, you can stick them, or just gun them down. Even if the gunner sees you when you try to flank, he can't keep his eyes on you and the squad, so he will chose one target. If he fires on you, then your squad can kill him. If he takes the squad, then you are still in perfect position for the flank. This tactic is one of the most effective and is used quite a lot by us.
Leaving Open Areas
Leaving Open Areas is more common sense than anything. This involves the player staying in areas that have lots of cover. The more cover in that area, that safer you are. So stay away from those open areas!
Fire and Maneuver
Fire and Maneuver is an extremely effective tactic designed to allow you to cover a lot of ground quickly and safely. Let's say you and your squad are in Valhalla and you have to capture the flag in the opponents base. Fire and Maneuver comes into play here. The way to do it is to start at your cover spot. Locate another covered area that is safe to hide behind. You fire off a few shots at the enemy, and then quickly move to your next covered area. Not only do you cover a lot of ground, but the enemy will look to where the fire came from, but you wont be there anymore, so it also adds in a little confusion if you execute properly. You are supposed to keep advancing to cover until you have reached your objectives. Keep in mind that since your popping off rounds, it attracts attention, and therefore you could connect this tactic with flanking. Also, make sure that when your advancing, you run for a cover spot that's close by. The longer you advance, the greater your chances are of getting killed. And also, don't take your chances of running to a far away cover spot, especially when it's in the open. This tactic will be impossible to defend if everybody on your team is executing this tactic at the same time. Send a few guys around on either side for a flank, supress all enemy fire and keep advancing and you will surely end the match in the snap of a finger.
Ricochet
When crouched behind cover and taking on heavy fire from a short distance, and if your enemy is bunched up in a group, you can try to fire off a wall and hope that your bullets ricochet and hit your enemy. If you know exactly where your enemy is, and you are good at finding a pinpoint location, you might be able to pull something like this off with ease. Normally, you just have to rely on luck to get the kill, but if it is the only resort you have, it may save your life. And yes, this is possible because we have seen a player get three heashots with one ricocheted round. So, if your hunkered down with an enemy on the other side of your cover spot, ricochet bullets off of a wall and hope for the best.
Strong Defenses
Another good tactic is to coordinate a strong defensive force. Let's say, again, there are about 8 men moving in on your base in Valhalla. It's the same setup as the scenario for Spreading Out, and you are about to be attacked. Strong Defenses means that you have a good force, you can fend them off and eventaully counter-attack them. Have some men take out the long range targets, others fight the medium range targets, and then maybe some charge in and handle the close range targets. The idea is to have each man with only one target, that way your conserving ammo, and you can take them all out much quicker than having everyone just shoot them one by one.
Trench Raiding
Although there aren't trenches in Halo 3 that much, this tactic also works for bunkers and buildings. If you have to infiltrate a bunker, and there is more than one entrance, this is where the tactic comes into play. You incorperate flanking, but instead of sending the flanking squad in by themselves, you follow in through another entrance. Your flanking squad will enter from the side, you enter from the front, and send a well armed squad around the back to attack from the rear. The men inside the bunker will be overwhelmed with fire and will not survive.
Spreading Out
Another VERY effective tactic is to have multiple soldiers in different areas of the map. Here's the scenario: You are leading a 10 man team up to the enemy's base on Valhalla. The purpose of spreading out is to maximize the distance between targets, giving your squad more time to react to fire and the opposing side less time to switch between targets. This was used by Death's Intent and I on Valhalla. We led in a 9 man squad and had them spread out. I and 1 other man were the snipers holding back at our base. DI was going up the middle with 2 others using Assault Rifles and the other four went on the right and left sides with SMG's and Shotguns. Nedless to say, that match ended pretty quickly.
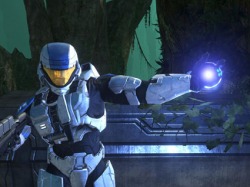
Duel Wielding

Duel Wielding is one of the easiest things to do in the game of Halo, but just picking up two weapons isn't really a tactic. Duel Wielding can only be called a tactic if you have a good combo. You can tell you have a good combo if you have weapons that are powerful, have a good firing rate, have good range, and have a good clip size. The most known Duel Wield is the "Noob Combo", but this is an anti-noob website. The "Noob Combo" is a Magnum and Plasma Pistol. Get up close, overcharge the Plasma Pistol, and the moment it hits, shoot them in the head with the Magnum. Plus, when you become more skilled in duel wielding, you will realize that the "Noob Combo" isn't exactly the best choice. The variant of the "Noob Combo" is the "Honorable Noob Combo", which is used by more experienced players and substitutes the Magnum for SMG, and you dont overcharge the Plasma Pistol. Attack them with the Plasma Pistol to get their shields down, then gun 'em down with the SMG. A good duel wield always consists of one plasma weapon to get their shields down, and one, preferably automatic, ballistic weapon, to kill them once their shields are down. An example of this is a Plasma Rifle and a Spiker. You use the Plasma Rifle to weaken the enemies shield and use the Spiker to kill them. You can also mix it up some. But, there are downsides. Some weapons are completely ineffective at certain ranges. The SMG is only good for close range combat, but Plasma weapons and the Spiker have exceptional ranges. Also, duel wielding weapons dont usually have headshot bonuses(Magnum has headshot bonus), so if your weapon has no headshot bonus, there is really no point in aiming for the head. Keep in mind that if you try to melee someone, you will lose your second weapon. If you melee a close target, and lose your other weapon, there is a high chance the other player is going to kill you.
