Grenades
Frag Grenade
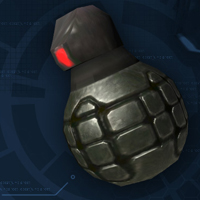
The Frag Grenade is the only grenade manufactured by the UNSC. When detonated, the blast of the Frag Grenade will take away the other players' shields, and if they are already down, it will kill him/her. The large blast radius of this grenade makes it really good for hitting enemies hard in the open. The only downside is that it can't kill a player with full shields, but it is good if you have an effective weapon that you can use to attack after the grenade has taken away their shields.
Plasma Grenade
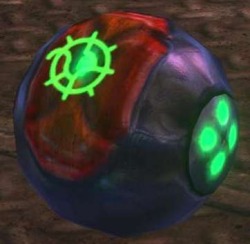
The plasma grenade is one of the most widely used pieces of equipment in Halo 3. It can, unlike the frag grenade, stick to anyone it hits. it will bounce off walls, but if it hits another surface that is not a player after the bounce, it will stick to it. It can also stick to weapons and equipment. If stuck to a weapon on the ground and the weapon gets picked up, the player who picked it up will die. The same does not occur with equipment. If stuck to a player's weapon and the weapon is dropped, the plasma will drop with it (so realistic!!). It has a smaller blast radius than the frag, but a greater one than the spike. Also, if a player sticks you, you should run straight at them. The downside is the fuse is very quick, so you have to be close enough to get to that player if you have any hopes of killing them along with you. But the best part about the Plasma Grenade is if your stuck or within the blast radius, it will kill you instantly instead of shield reduction shown by the Frag Grenade.
Spike Grenade
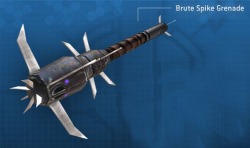
The Spike Grenade is the most effective Brute grenade. It sends spikes in the opposite direction of where it is stuck to, unless it is blown up in midair, in which very short range spikes are sent in all directions. This grenade is very useful indoors and in tight spots, because the spikes bounce off walls and ceilings. It is also very effective because, like the plasma grenade, it can stick to your enemy, making it deadly when close in to the user. The only downside to the Spike Grenade is that it has the smallest blast radius of the three grenades.
Firebomb
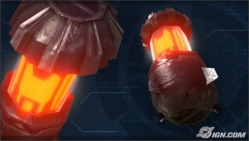
The Firebomb has no blast radius, but it emits a very deadly flammable liquid. When exposed to this for a few seconds, it will kill you. Aside from being able to clear out small areas, the Firebomb does have three downsides. One, it can't stick to anything. Two, it can't bounce because it explodes as soon as it comes in contact with anything, so you have to make a good throw. And three, it only burns on a small area and for a short time, making it easy to escape from. But, if you want to clear out a building, you can definitely rely on this explosive.
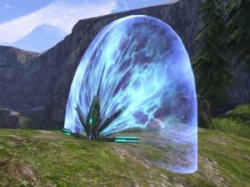
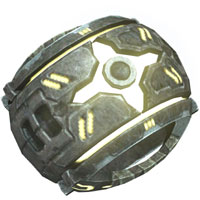
Bubble Shield
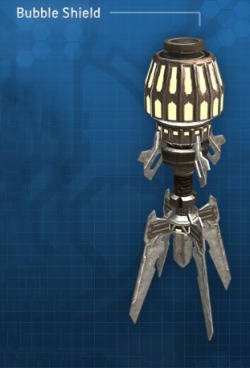
The Bubble Shield is a clear dome that prevents all projectiles and explosives from getting in. However, it doesn't keep vehicles or players out, so don't try deploying it to avoid getting splattered. If you do, well...enjoy being a hood ornament for the next five seconds.
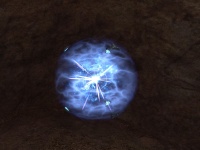
Regenerator
The Regenerator is the savior to a player with low shields. When you pop out your Regenerator, it will regenerate your shields right then. This will only work if you stay within a close proximity of it. But, don't pop it out if you are being attacked by a close enemy. It will keep his shields recharged while he fires on you.
Radar Jammer
The Radar Jammer is the best way to confuse, and annoy your enemy. If you know your enemy is hunting you down, you can pop out your Radar Jammer and your enemies radar will be flooded with red dots, keeping him from seeing you. The only downside, you can't see him on your radar either. So, don't drop this if you are chasing somebody, because you will have done them a favor. If your tailing a player, and your about to move in for the kill, only drop this if you know where he his.
Deployable Cover
Deployable Cover is a very good way to provide instant protection, and its good enough to let your shields recharge. The Deployable Cover is an instant shield to all projectiles and explosions, but it wont last long if it is exposed to heavy fire. Also, if you are trying to get through a Deployable Cover, you can just hack right through it in about 3 hits if you melee it.
Flare
The Flare is probably the best way to stall for time. If you are taking on fire, you can deploy a Flare which will keep the enemy from seeing you, giving you time to escape or find cover. The only downside is that the Flare only lasts for a couple of seconds, and it will abstruct your vision if you are exposed to it.
Overshields
The Overshield power up gives the player a second level of shields, making him harder to kill. The overshields offers great protection against explosives, medium amounts of fire and other forms of damage. But do keep in mind that they will eventually wear off.
Active Camo
Active Camo is the traditional power up used to stalk an enemy. The active camo, when touched, renders you nearly invisible to enemies. The only downside to this is that whenever you shoot, deploy equipment, toss a grenade, or take on heavy fire, your invisibility begins to fade off. So, in order to keep it working, you must be "Silent".
Trip Mine
The Trip Mine is by far the most widely used piece of equipment used to destroy vehicles. When deployed, it explodes when another player or vehicle gets to close to it. This is also a very effective defense for avoiding splatters. You deploy it just before the vehicle hits you, then jump to avoid the blast.
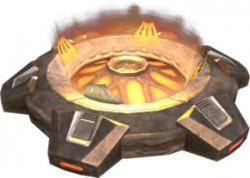
Grav Lift
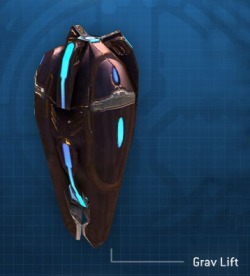
The Grav Lift is basically a portable man-cannon. When you deploy it, it shoots up a verticle stream of air so that you can fly vertically through the air, perfect for excaping a splatter, avoiding a rocket/laser, and quickly getting away from other players. The only downside, it won't lift you extremely high in the air, so don't plan on ending up on the other side of the map when using this.
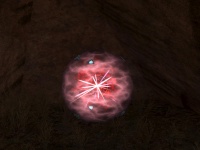
Power Drain
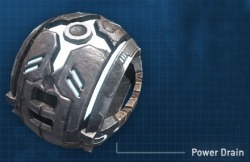
The Power Drain is a very affective peice of equipment. It quickly drains the shields of opponents so that you can get an easy kill. But, if you get in too close, it will also drain your shields. Make sure that if you are in too close, kill the other player before he has time to fire on you. Also, the Power Drain disables vehicles, so you can destroy a vehicle that somebody is driving and lower their shields.
